

Automating Workflows: Sending Weekly Reports
Jared Drueco | July 14, 2022
This week I created an automated workflow that emails a report to a user weekly. To do this, I used a ‘Codeunit’ to implement the logic and a ‘Job Queue’ to schedule the task at hand. Although there are built-in workflows in Business Central, I found that writing an AL script.
Codeunit For Sending Emails in AL
Before I created the codeunit, I had to set up SMTP mail in Business Central. To do this, I went to the ‘Email Setup’ page, and filled out the information from the email account that I planned to send from.
To start off, we create a codeunit that holds a procedure which gets called when the codeunit is run (It is run when the job queue calls it). We also initialize variables necessary to save a report and send it as an attachment via email.
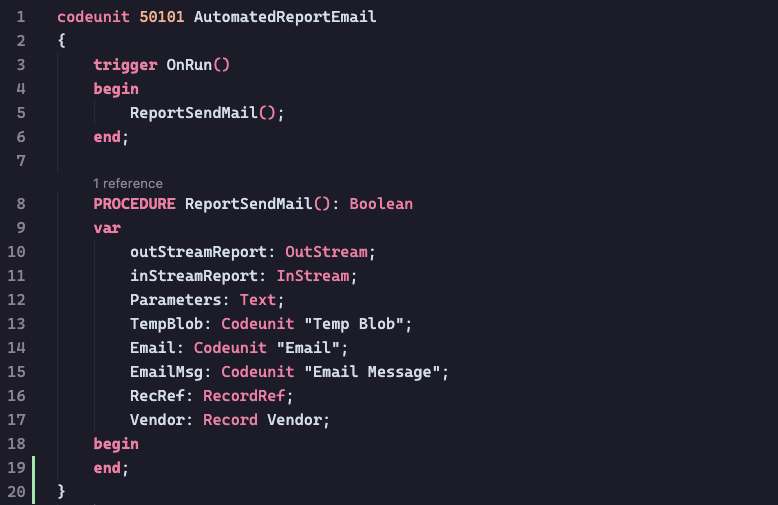
The report that we are sending is the ‘Vendor Trial Balance’ report which extracts data from a Vendor record. In this case, we filter out a vendor with a ‘Number’ ID of 10000 and get their information within a certain period of time (their first Fiscal period).

Now we create an email message using the built-in EmailMsg.Create() method. We pass in the following parameters: the email account we send to, the email subject, the email body, and a boolean to determine if the body is HTML formatted.

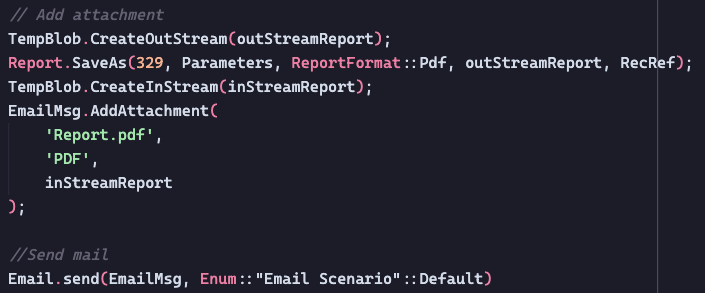
Next, we use a temporary BLOB to create an out-stream and use the Report.SaveAs() method to write our report to. Then, using an in-stream to read the report, we can attach it to the EmailMsg we created above. Finally, using the Email.send() method, we can send the EmailMsg object we have been creating.
Job Queue for the Codeunit
After compiling and deploying our new codeunit, we can head over to the ‘Job Queue Entries’ page to create a new job queue. All we have to do on the Job queue page is to specify the codeunit and the frequency we perform that codeunit.
For my task, I want it to be weekly starting from the day I created it, so I use the formula: ‘1W’.
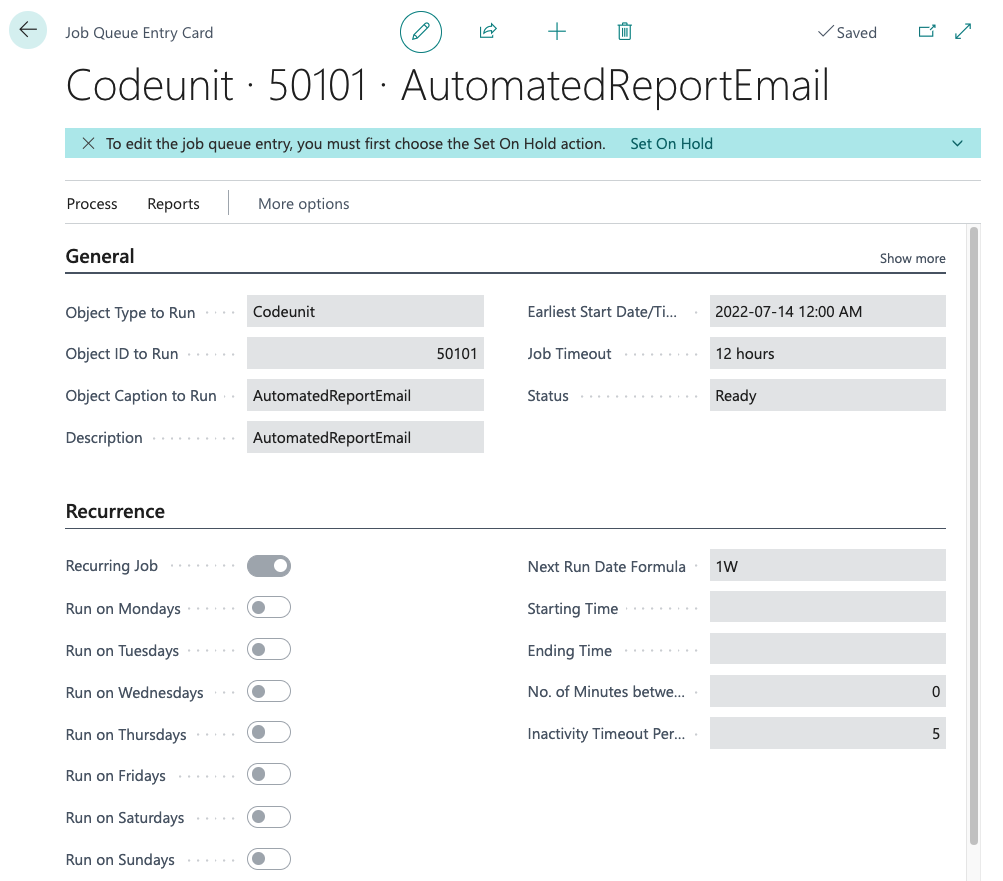
The last thing we need to make sure of, is to set the Status to ‘Ready’ so Business Central knows that we are done editing the job queue.
