

Dynamics 365 CE & Service Bus
Rayyan Rashid | June 19, 2023
The last time we spoke about how we can send messages to a service bus, we learned that we could do so with the provided code snippet. However, that requires us to sign into visual studio with an azure account that has been granted the ‘Azure Service Bus Data Sender’ role.
Adding each and every one to your Azure workspace and separately assigning the respective roles can be a tedious task. However, a very small but effective change can speed things up. As discussed earlier, we can create a client reference for our service bus and use our credentials to send messages through the code snippet shown below:

We can now use a connection string and remove the necessity of any credentials as shown:

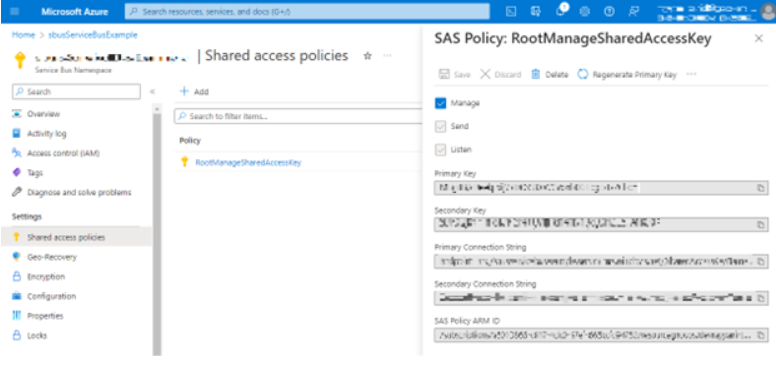
We can find the connection string for our service bus and create more if desired through the ‘Shared Access Policies’ setting:
Settings -> Shared Access Policies -> Select a Policy -> Primary Connection String
Perhaps you don’t want to code but still would like to send a message to your service bus for testing purposes, this is when we can use POSTMAN to send messages to a service bus. POSTMAN is a software tool used by developers to test, document, and interact with APIs. It helps in building API requests, testing API functionality, creating mock servers, generating API documentation, and collaborating with team members.
To send messages to a service bus using POSTMAN, we first start off by registering an app with Azure Active Directory (Azure AD). We can access our Azure AD and click on ‘App Registrations’ to create a new application. As soon as we do that, make sure you note down your app’s client ID and tenant ID, we will need this later. Create a new client secret in the ‘Certificates & Secrets’ section and note that down as well. Just like we did earlier, assign the ‘Service Bus Data Sender’ role to your Azure AD app.
Now that we have our client secret, client ID and tenant ID; we open POSTMAN and create a new GET request and fill the following URI:
In the ‘Headers’ tab, enter the following for key and value respectively:
Content-Type : application/x-www-form-urlencoded
Then switch over to the ‘Body’ tab and enter the following keys and values:
grant_type: client_credentials
client_id : <CLIENT-ID>
client_secret : <CLIENT-SECRET>
resource: https://servicebus.azure.net
In our code, we either used our Azure credentials, or a connection string. The purpose of this GET request was that when you send this message, it returns an Azure Access Token, this is what we use to send messages to our queue.
We now create a POST request with the following URI:
We add the following headers:
Authorization: Bearer <TOKEN from GET request>
Content Type: application/atom+xml;type=entry;charset=utf-8
Finally, we send a raw message in the 'body' tab. As confirmed earlier, we can track these messages on the Azure Portal.
I had talked about using Logic Apps to integrate an e-commerce platform with Microsoft CRM, I would love to share a more detailed explanation on how this logic app works so make sure to keep watch for future posts!